
A few weeks ago while I was shopping on Banggood for new parts I wanted to try out, I came across this great robot kit from Geekcreit. The Geekcreit® L298N 2WD Motor Ultrasonic Robot Car Kit (Banggood) is based on an Arduino board and includes many parts I was looking to purchase separately such as:
- Ultrasonic sensor
- Standard motors
- Motor driver board
- Servo motors
If you would rather purchase from Amazon, I’m pretty sure this kit is the same thing.
For a low price point, it’s a fun project to experiment with to learn more about autonomous robots. The assembly requires a few tools and a bit of resourcefulness, but doable even for a beginner. It’s also cheap enough that you won’t feel bad if you make a few mistakes.
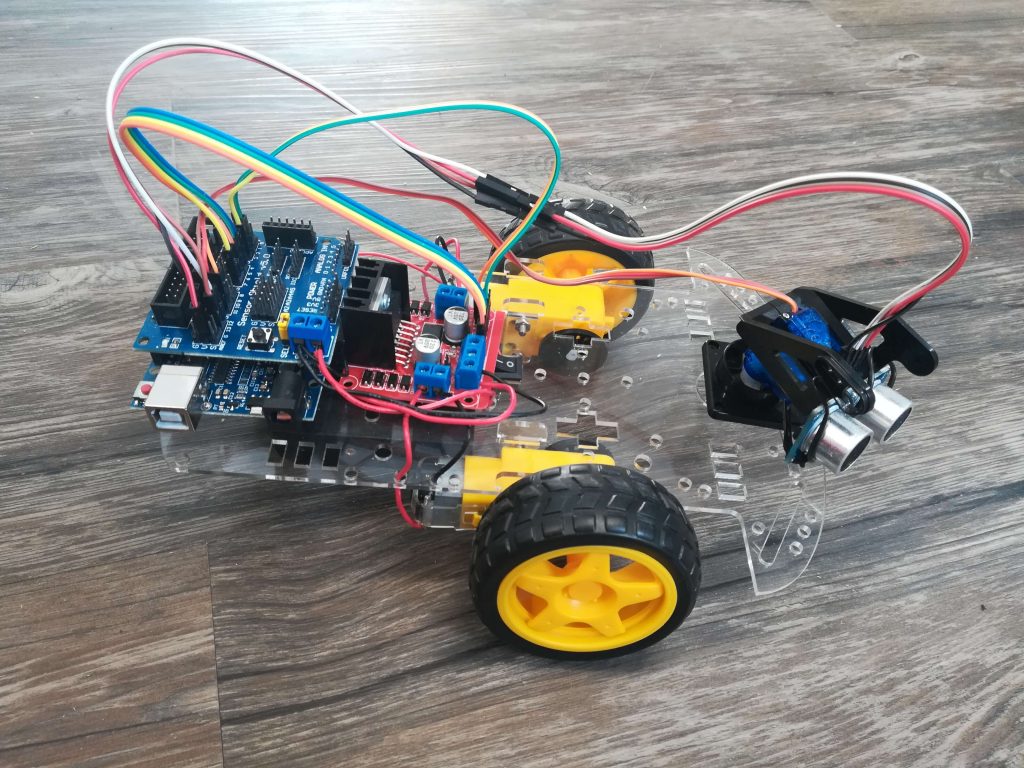
Assembling the Robot
To build the kit, you’ll also need a few of your own supplies to complete it, which are pretty common if you tinker with electronics:
- A soldering iron
- A small star screwdriver; the kit includes one, but it’s hard to use with the smaller screws (Amazon)
- Cutters and wire strippers
- Jumper wires to link various boards to the Arduino; 20 cm (8 inches) should be enough (Banggood or Amazon)
- A few lengths of 22 awg wire (or something close) for the motors (Banggood or Amazon)
- 4 AA batteries to power the robot (Amazon)
The PDF reference manual in the listing (there is a slight mistake in the listing, here is the correct link http://myosuploads3.banggood.com/products/20191215/20191215200239robot-car-instructions.pdf) is pretty detailed with a lot of pictures. Just throw away the paper manual in the box that only describes the chassis assembly.
The biggest hurdle is that the mounting holes for the electronics and sensors are not in the same place as in the reference manual. I used sticky Velco instead (like this one on Amazon) to hold everything in place and it worked just fine once it dried properly.

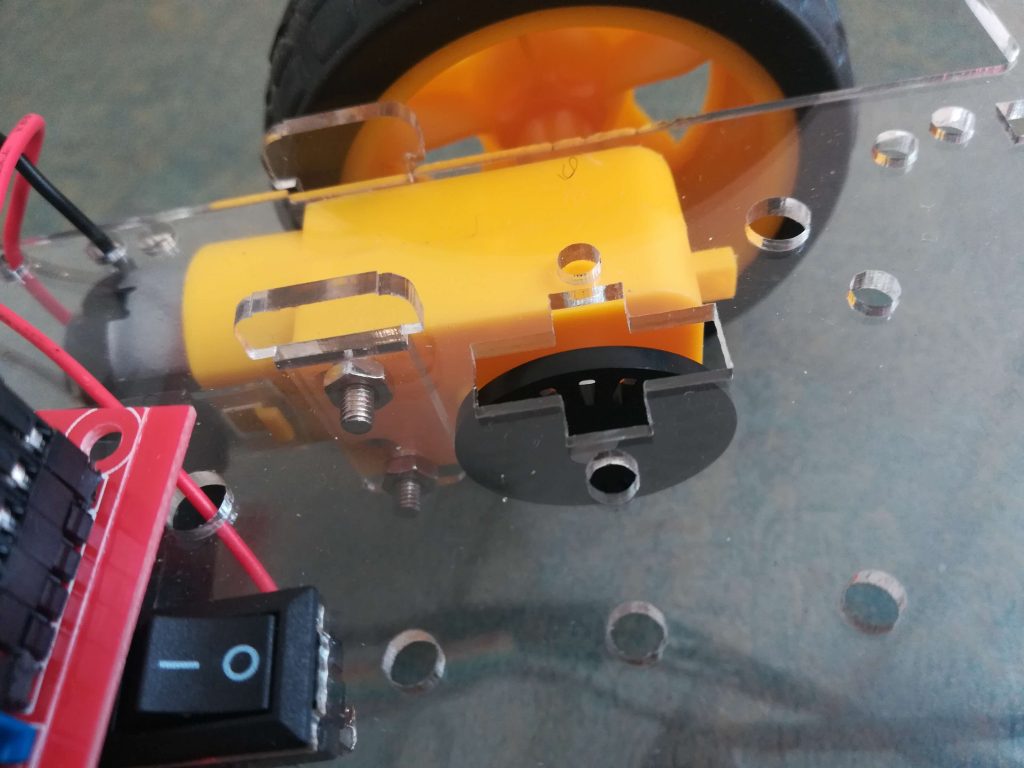
I also had a bit of trouble with the pins holding the motors to the chassis. Two of then were a bit too wide, so I broke when trying to remove it from the board because it won’t go all the way in. It still works since there is one on each side of the motor, if not as sturdy. If I do another one, I would sand it beforehand if it was too tight instead of trying to force it.
Expect to have some leftover parts at the end; it looks like they combined a few kits to build this.
Programming the Robot
The complete code for the robot is in the manual, so you can program it with the Arduino IDE. If you’re flashed a LED before, it’s the same process: the included board is an Arduino Uno clone. The USB cable needed to program the robot is also included in the kit.
Since the code is in a PDF and you need to convert it, there was a bit of work to convert it back to a usable form (I’m not publishing it here since there was no clear license included with the code). Just be careful with the minus signs in the code; you’ll need to write them out again since it’s not the right symbol. If you forget, the Arduino IDE will display a weird encoding error when you try to compile the code.
Running the Robot
Once it’s programmed, you just need to put batteries in and try it out! Switch it on and if everything works correctly, the robot will try each motor forward separately for a few seconds. You can then put it on the ground and it will start going around, scanning with the ultrasonic sensor.
If one of the motors is not spinning forward correctly, just reverse the wires on the motor driver board. Otherwise, if it’s not working, recheck all your connections.
The autonomous navigation of the robot is not perfect since it can’t see very high or low, but it will avoid most obstacles at its height. You can then try to improve on the program yourself!